Friday, June 19, 2015

Book Illustrator- "If You Take a Mouse to School" (and other books in the series) by Laura Numeroff & Illustrated by Felicia Bond

As part of our Book Illustrator lesson plan, the 4th, 5th and 6th grade classes created illustrations of Laura Numeroff's well-loved children's books "If you..."
Each student was given one page of the story, with only the words as a guide. 
I read each book out-loud, so they would understand the overall story-line. 
I encouraged them to come up with their own ideas of how their part of the story would be illustrated. A few struggled with this, so after some time had passed, I allowed them to look at Felicia Bond's drawings in the book. 


We talked about how her work is very detailed. There are a lot of little things that a person might notice that aren't mentioned in the text of the story. For instance, on the book cover, the little mouse is wearing overalls. It might cause the reader to wonder how he got such tiny clothes. ;)


Here are some of the pages that the 4th grade class illustrated for "If You Take a Mouse to School". The teachers of the three classes were kind enough to let me have some wall-space in their classrooms, so that we could display the kids' work. 


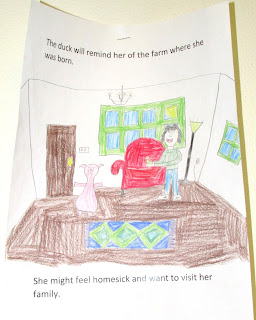
The 5th graders illustrated "If You Give a Pig a Pancake".


One really great thing about this lesson was that for the student who works quickly and thinks they're "done" after 5 minutes, I was able to point out ways that they could add more detail.  In the picture above, for instance, the student drew the pig at the table and said, "I'm done." 
I asked him, "Where are the pancakes?" He added pancakes. "I'm done." 
"What is the pig going to eat them with?"
 So he drew the fork and knife. 
Then we talked about other details that could be added, such as a clock on the wall. 


Sixth Grade illustrated "If You Give a Mouse a Cookie". 


Learning to be book illustrators was a really fun project for this age. 
Unlike the 1st- 3rd graders' Eric Carle books, where they added color and texture to the already illustrated pages, the older kids had to imagine the story and draw their ideas, 
based only on the written words. It's an easier task for someone who is a visual thinker, but it's good to challenge those that are not as natural at it. 
Practice is key!

Book Illustration- "The Very Hungry Caterpillar" by Eric Carle


I decided at the beginning of the 2014-2015 school year that I wanted to have an art class theme. 
It seemed like that would help me in gathering ideas and spur on my own creativity.
 It also helped keep a focus on the purpose of each art lesson.
In working with 1st grade through 8th grade I wanted to keep the focus the same,
 but vary the actual lesson to fit the grade level. 
The theme I chose was "Art Careers". 
For this art career lesson I chose Book Illustrator. 
Choosing Illustrators to learn about was easy for me. 
I love children's books and have often wished I could author and illustrate my own books for kids. I've started the writing part of it a few times. ;)
One of my favorite author/illustrators is Eric Carle, best know for 
"Brown Bear, Brown Bear" and "The Very Hungry Caterpillar". 
I decided to have my 3rd graders (17 students) work on "The Very Hungry Caterpillar" and the 1st and 2nd graders (a combined class of about 20 students) do "Brown Bear..." 


I talked a little bit about Eric Carle and showed the children the actual books. 
I had them take note of Carle's particular style of artistry. None of his colors are just "flat". 
There's a lot of layering in the pieces of painted paper he uses and the illustrations appear to have texture. For the cover page, I had the students make a multi-toned caterpillar, using a variety of markers. On the leaf page (pictured above) we used over-lapping tissue paper in two shades of green. Then the students glued on a tiny, white pom pom for the egg.


This was fun too... I was able to recreate the way that Eric Carle had the fruit pages cut to display the quantity of each piece of fruit that the caterpillar ate through. 

Monday-1 apple.


Tuesday-2 pears.

Wednesday-3 plums.

Thursday-4 strawberries.

Friday-5 oranges. 

Then he ate a bunch of junk. 
The kids enjoyed talking about this page... 
and about what a belly ache they would have after eating all of this. =)


I used a black Sharpie to create these illustrations and printed the text from my computer. 
It took a couple of tries to get it just how I wanted it. 
Once I had everything perfected, I made enough copies for my classes. 
Someone asked why I didn't just find something on-line. I would've if I could've... trust me.
But, really it wasn't that hard. And I enjoy that sort of thing. 


For the cocoon, I had the kids rip up pieces of brown paper 
and glue them on however they wanted. 
Luckily, we had different tones of brown construction paper available in our art closet. 
I also used this same technique for our "Brown Bear, Brown Bear" books. 


Finally the caterpillar emerges as a beautiful, colorful butterfly. I left some metallic confetti sitting on the table, thinking the students would put them on piece by piece. I turned my back for only a minute (or two). When I came back to the group that was working on this page, they had spread glue all over the wings of the butterfly and were sprinkling the confetti on like glitter. Oh my! Well, I hadn't exactly explained what I wanted them to do with it, so... (naughty art teacher). 


It took 5 or 6 weeks to complete our books. As a first year art teacher, I'm learning along the way. I discovered very quickly that students work at different paces (sometimes the difference is extreme). You may have one student who completes 3 pages in one class period and another student who doesn't even complete one page in the same amount of time. 
You begin to pick up on their personalities and what you can expect from them.
Overall, I give this project an A+. 
It was fun, the kids were able to personalize their books and be creative. 
I'm sure they were excited to read them to their parents.
When I showed this project to the kindergarten teacher at our school, she suggested that I have the kids come to her classroom and read their books to her students. We did just that. 
The 3rd graders read "The Very Hungry Caterpillar" to her class and the 1st and 2nd graders read 
"Brown Bear, Brown Bear" to the preschool classes. 
The story time was a big hit!

Hear Eric Carle read "The Very Hungry Caterpillar"


Thursday, June 18, 2015

Marble Painting

Nope, I'm not going to show you how to paint marbles. I am going to show you how to create beautiful, colorful paintings using marbles. I asked my girls if they'd like to try it and being the little crafters that they are, they of course, said "YES!"
You only need a few supplies, which are all pretty inexpensive... 
and most you already have in your home. 

Supplies:
1) Acrylic Paint in a variety of colors. (I have a large stash, but you can pick up the small bottles of craft paint cheap at your local craft store. Michael's, Hobby Lobby, JoAnn and even Wal-Mart carry craft paint. Prices range from .50-$1.00 per bottle). For this particular project I think the cheaper the paint* the better. It really needs to be pretty runny. The higher quality paints are usually thicker and don't work as well for this (as I found out the hard way). 
*Apple Barrel and Craft Smart brands seem to be thinner. 

2) White cardstock or mixed media/heavy weight paper

3) A large box that will fit atleast one piece of paper. (As you can see in the photo below, ours held 2 pieces). 

4) Wax paper.

5) Masking tape.

5) Marbles.


We started by lining the box with wax paper. Make sure the box is free of any debris and smooth the wax paper down, so that it is flat with no wrinkles. We were fortunate, in that the wax paper fit perfectly, but you can also cut it to fit or allow it to go up the sides of the box a bit.  If the wax paper isn't flat and smooth, your paper may lift up and the marbles will roll under the paper
(another thing we learned the hard way). I decided to put a small roll of masking tape on the back of each piece of paper to keep it from moving around during the marble rolling. 
This proved to be a smart decision. 1 point for me! ;)


My daughters selected the colors they wanted for their art creations and I let them drizzle the paint on the paper themselves. This is where it helps if the paint is already a bit watery. You really don't want big blobs, as the marbles get kind of stuck and it's harder to spread the paint around 
(if that makes sense). 


After getting the colors on the paper, the fun part begins. 


Tip the box back and forth, side to side, allowing the marbles to pick up paint as they go and creating this really cool streaky effect. 


Each of my daughters (ages 11 and 6) took turns playing around with this technique. Between each round of marble painting, we removed the 
marbles and wax paper and started over with fresh supplies. 


Here is my marble art. My girls thought my choice of colors was "interesting". They didn't care for the sand color I used. But, they didn't know that I already had a plan formulating. They were content just to create the marble painting. I knew that I would want to use mine to create another piece. I'm currently working on a 30 day art challenge, where I'm making one piece each day for a month and posting my efforts on my personal facebook page. The reason I'm doing this is to challenge myself to find some new things to teach my art students when school starts up again in September. I'll be teaching high school students (as well as the 1st-8th graders I already work with) and think it'd be cool to start art journals with them. 


I began by hand-drawing the coral on the back of the coral-colored piece of marbled paper (makes sense). By drawing on the back, there's no fear of my lines showing and if I don't like what I've done, I can just draw over my first attempt... or fine tune my cutting lines. Then I drew and cut out a seahorse and starfish from my darker, blue-toned piece. Again, I drew them by hand, but you could certainly print off an outline of a seahorse (for example) to trace around. 
The floor of the ocean was from a section that had mostly the tan, sandy color. Once I had those elements cut out, I began tearing strips of colored cardstock to form my background. I think the tears and over-lapping give it a sense of depth and motion. I used gesso to adhere all of the pieces. Gesso is an amazing tool that I have recently fallen in love with. You could also use white tacky glue or double sided adhesive, though. Lastly, I used a toothpick and gesso to draw on the little bubbles. The toothpick worked well for dropping dots of gesso on the background. Then when it was slightly tacky, I went back in with the toothpick (in a circular motion) and removed the center of each dot. 


My seahorse design was in part inspired by one of my all-time favorite illustrators, children's book author, Eric Carle. He has a certain way of hand-painting his paper, cutting out the pieces and placing them just so to create these endearing books.


My favorite one of his books, though, is Brown Bear, Brown Bear, What Do You See?
It was the first book that my son read out loud (or actually recited from memory). 
It was especially meaningful to this momma, because he was 4 years old and the words from this book were some of his first words, as he was diagnosed with autism when he was two and 
was non-verbal until his second year of pre-school. 


To learn more about Eric Carle, check out this interesting video about the artist: Eric Carle